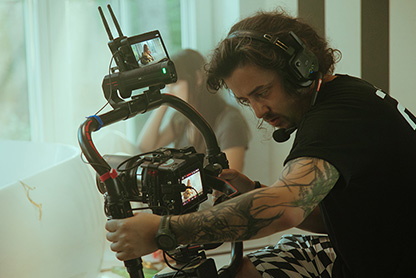
Wireless microphones have changed the way content producers, professionals, and people who work from home record audio. As technology improves, these small gadgets give users more options than ever before, but many people have trouble making the most of them. This guide shows you seven important ways to improve the performance of your wireless microphone. These tips will help you get perfect sound quality anywhere by handling problems like signal interference, audio clarity, and maintenance.
Positioning the microphones correctly is the first step to getting crystal-clear sound. The best place is about 15 cm away from your mouth. This creates a sweet spot that picks up your sound very clearly while cutting down on background noise. Make sure that your clothes and items don't get in the way of or muffle the microphone's sound capture.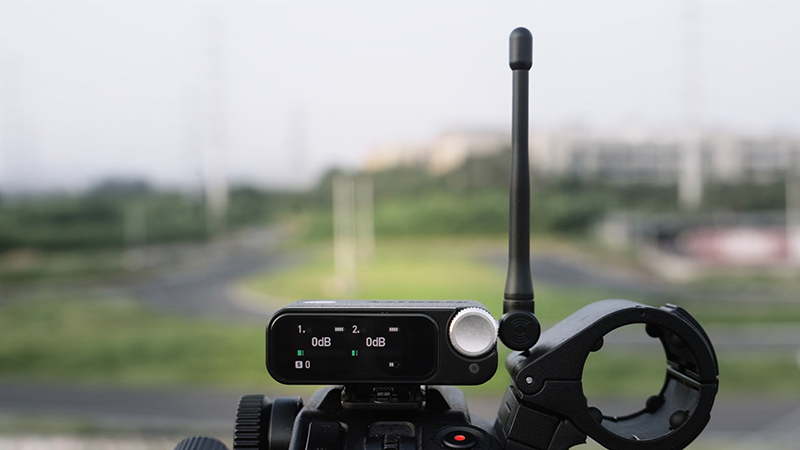
Positioning is different depending on the situation. For video content, tilt the microphone slightly downward. For interviews, use a clip that stays at a constant distance from your speaking point. Try out different ways to place the speakers to find the ones that produce the most natural and clear sound. Watch out for your moves and any rustling fabrics that could cause noise that you don't want to hear.
Wireless microphone performance is critically dependent on managing electromagnetic interference. Modern digital wireless systems are designed to combat signal disruptions, but proactive management is key to maintaining pristine audio quality. Identify potential interference sources like Wi-Fi routers, mobile devices, and other wireless systems in your environment. Professional-grade microphones offer multiple channel options, allowing you to switch frequencies when experiencing signal congestion.
Open spaces with minimal electronic devices provide the most stable transmission. Consider using frequency scanning features if available on your device. In complex audio environments like conferences or studios, invest in professional-grade wireless systems with advanced interference rejection technologies to ensure consistent, high-quality sound transmission.
Wireless microphone systems depend on how well their batteries work. Come up with a complete charging plan that goes beyond simple "plug and play" methods. Before you make important recordings or perform, always make sure that your radio, receiver, and charging case are fully charged. These days, lithium-ion batteries work best when they are regularly partially discharged instead of being completely drained. Keep a close eye on the battery indicators and make sure you have extra power sources on hand.
Keep your devices in places with stable temperatures. Avoid putting them somewhere too hot or too cold, as these can hurt the batteries. Buy good charging devices that let you precisely control the voltage and keep from overcharging. If you are a professional who uses wireless microphones, you might want to get more than one battery pack to make sure you can record or act without interruptions.
For professional-quality audio, it's important to keep the link between the transmitter and receiver of your wireless microphone strong. Make sure there is a clear line of sight between devices, and know that walls, metal items, and places with a lot of electronics can interfere with signals. Modern digital wireless systems have improved pairing technologies, but in some situations, you may need to do something by hand.
Learn the exact steps for pairing your device and learn how to quickly reconnect. If there is signal instability, you should carefully figure out what's wrong by changing bands, moving devices, or removing possible sources of interference. Some professional systems show the state of the connection in real time, so you can act right away if the signal starts to weaken.
Professional sound recordings are distinguished from amateur ones by precise audio level control. Do thorough audio-level tests on your microphone to find out its best performance range before you start any important recording. Start with low input volumes and slowly turn them up, paying close attention to distortion or audio clipping. Use the monitoring tools that come with the device to see how loud it is in real-time.
Volume adjustments need to be made for a variety of speaking styles and settings. For example, a podcast recording is very different from a live presentation. You might want to use external audio devices or mixers that let you fine-tune the input sensitivity. To get professional, controlled sound quality, practice keeping your volume steady when speaking at different levels of intensity.
With regular care, you can make your wireless microphone last a lot longer and work better. Clean the device carefully with a soft, dry microfiber cloth every time you use it to get rid of dust, sweat, and other possible contaminants. Do not use harsh chemicals that could hurt sensitive electrical parts. Put your microphone away in a special protective case that will protect it from damage, moisture, and changes in temperature.
Check connectors, wires, and microphone heads for signs of wear and corrosion on a regular basis. For people who move a lot of work in tough places, you should buy professional-grade, rugged carrying solutions. Set up a regular maintenance schedule that includes skilled servicing and calibration on a regular basis.
Adding the right accessories to your wireless microphone can change what it can do. For outdoor records, windshields and foam covers are necessary to cut down on wind noise and improve sound quality. Look into magnetic clips that let you place things securely and easily. In difficult recording settings, longer cables make it easier to move around and change how things are set up.
You might want to look into mounting options that are designed for specific uses, like broadcasting, podcasting, or stage shows. Some high-tech devices have extra features for reducing noise, keeping the signal stable, or adapting to different environments. Find out if the accessories you buy will work with your specific microphone type and buy high-quality ones that were made to go with your other gear.
To get the most out of a professional wireless microphone, you need to take a comprehensive approach that includes careful placement, planned maintenance, and smart accessory selection. By using these seven important tips, you'll improve your ability to record sound and make sure that every recording has great sound quality. Follow these tips to get the most out of your wireless microphone and improve your professional recording experience.